
With sweeping changes coming our way from Apple and Facebook, there is one very important step all business owners need to take ASAP: Verify their domains in Facebook Business Manager.
Here’s some information for you to pass on to them on how to do this surprisingly simple task. And don’t forget to verify your domain, too!
This process took me all of six minutes on a Tuesday afternoon, so don’t think of this as having to set aside a large amount of time.
Download our white-label step-by-step instructions to share with your advertisers.
Here’s the rundown on this process:
Facebook Domain Verification
Who: Every business with a Facebook page needs to do this, even if you’re not running paid ads. Your organic content is affected, too.
What: Domain verification is a way to let Facebook know that you own this website. You’re claiming ownership by putting a unique DNS record on your site, enabling you to control the editing of links and images from your site when they appear on Facebook.
When: Do this as soon as possible. We expect the iOS updates any day now. Really, it could show up tomorrow, so best to be prepared.
Where: This will happen in two places:
- In the Facebook Business Manager account where your business page is owned.
- In your website’s hosting account (i.e. GoDaddy, BlueHost, etc.)
You’ll need to be logged in to both places and have administrator rights to the Facebook Business Manager page.
* If you don’t own or have admin rights to your Facebook Business Manager account, you’ll need to resolve that ASAP with Facebook at
Why: With privacy concerns at the forefront and Apple’s changes coming soon, Facebook is doubling down on verified content. This isn’t a bad thing. The verification process has been there for quite a while, but now it’s going to be required for all paid advertising on their platform.
It’s similar to how back in 2016 we, as marketers, had to verify our identities with Facebook to place political ads on their platform.
How: This is the fun part.
In your business manager account, navigate to Business Settings > Brand Safety > Domains
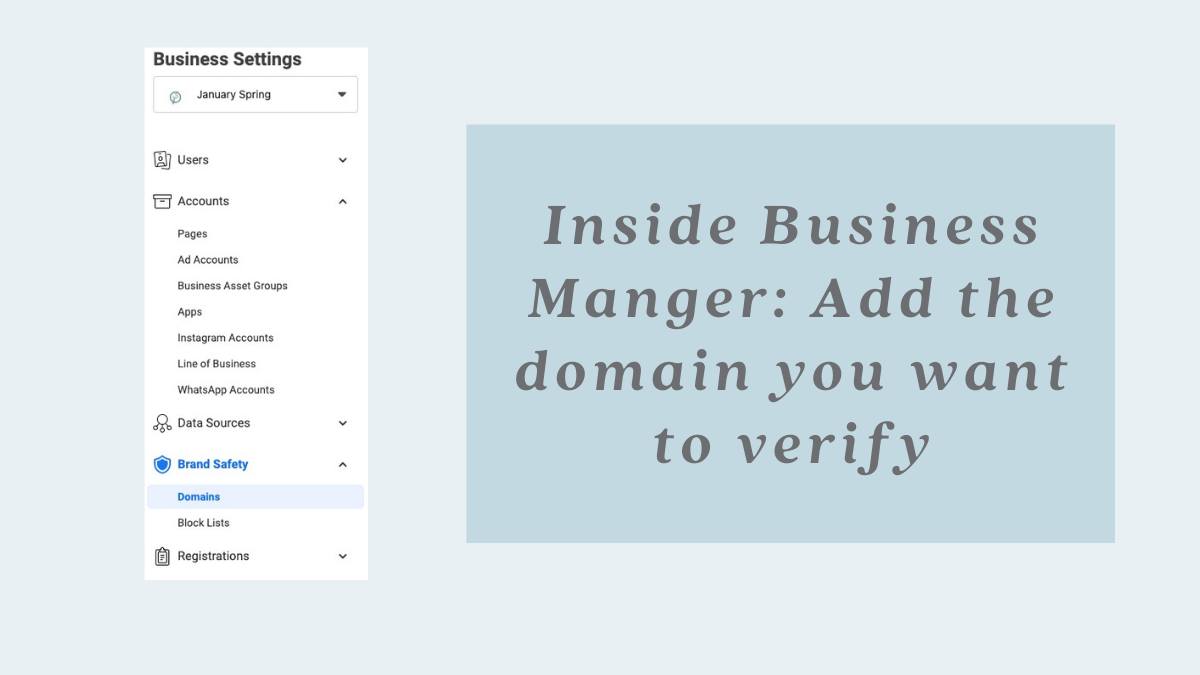
Add the domain you want to verify (i.e. JanuarySpring.com)
Refresh the page if it doesn’t update automatically.
Now you’re given several options. The easiest way is DNS Verification.
Log in to your domain hosting service and find the DNS records section. This is the step that took me the longest, probably a solid minute to find this:
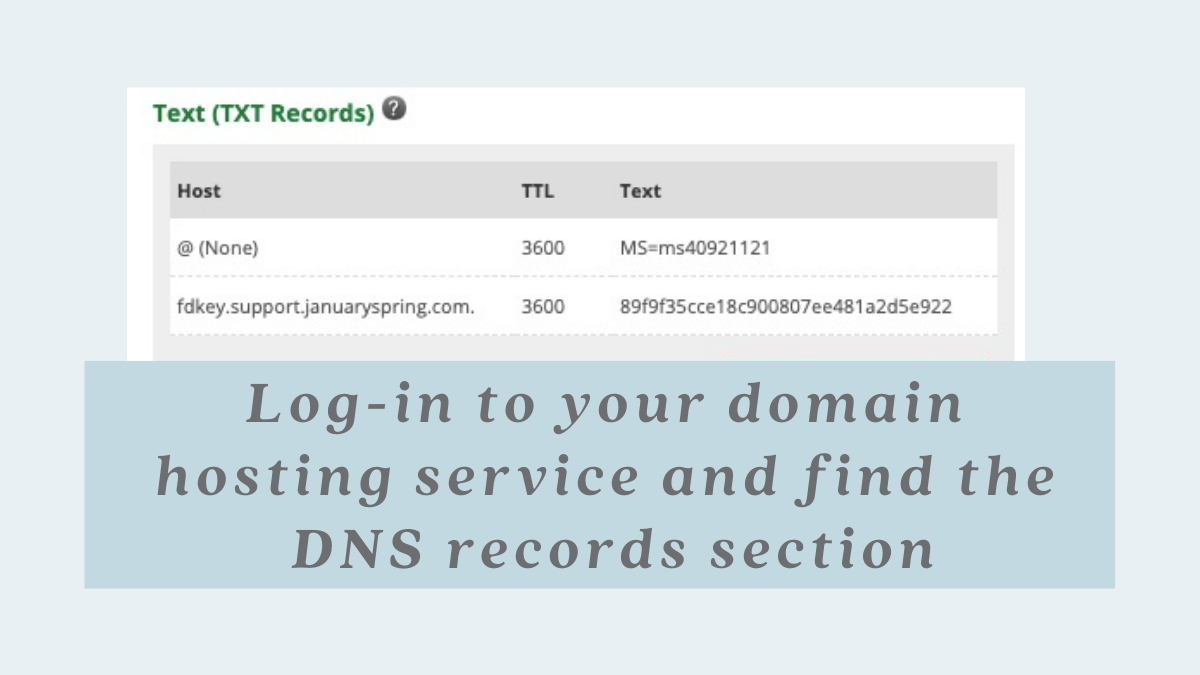
It was located under the intimidating label of “Advanced DNS Settings.”
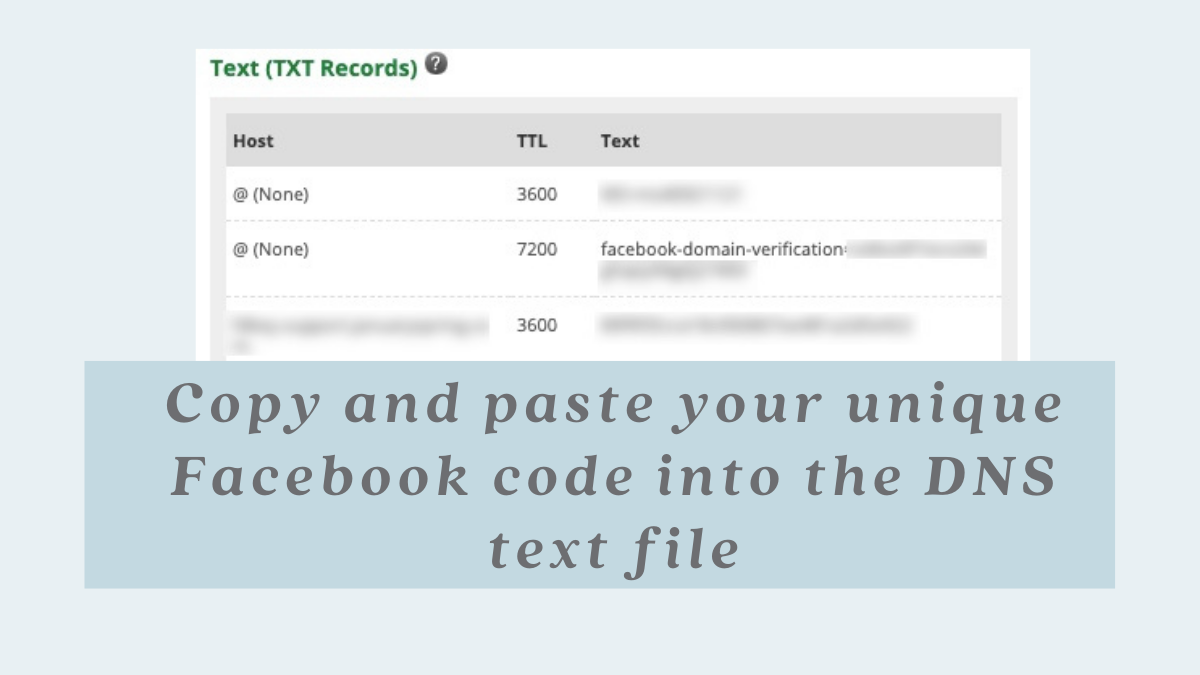
Maybe I should mention here that I’m NOT a web developer and am capable of little more than copy and pasting things into a WordPress boxes when it comes to this sort of thing. Advanced Setting did not look like something I should messing with, right?
However, I can copy and paste our unique Facebook code into the DNS text file and click ‘Save.’
And now we’re all set.
It may take up to 48 hours before the change takes effect across the servers, so be sure to go back to your Business Manager account and verify the change by clicking the green ‘Verify’ button.
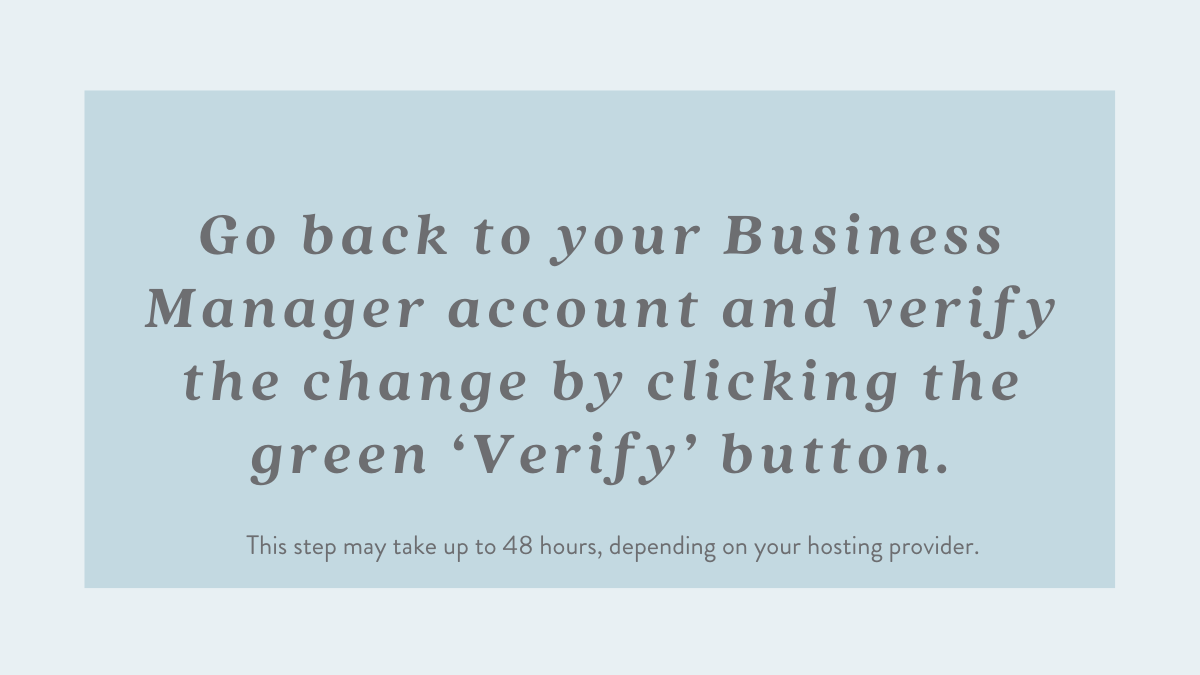
That completes the process. Easy, right?

Check out this page from Facebook:
https://developers.facebook.com/docs/sharing/domain-verification
There is a short, how-to video there, too.
Don’t be intimidated by the ‘Developers’ label, this page is user-friendly.
Don’t forget to share this information out with all your business ASAP so we can keep serving up successful campaigns!
Note: If a business page and the associated ad account is currently not managed in Business Manager, you won’t be able to verify the domain. A business owner should move their page and ad account to a Business Manager account here: https://business.facebook.com/overview